Thursday, December 29, 2011

Scrappy Nook in New House

 Finally I have finished organizing, cleaning sort of and taken pictures of my little piece of Peace LOL. This shot is from the top of the stairs looking into the nook. You can see my favourite piece of furniture here, the wall unit with all my paper storage. I need at least one more of this with nothing but paper storage LOL have me to many DCWV stacks. Beside it is a little computer desk that I have reused for storage.Hanging from the ceiling are large plastic gems on black ribbon. Adds some sparkle!

 This is a close up of my paper stacks. All DCWV, LOVE their CS find it nice heavy weight and I enjoy the glitter and foil they use in the paper. Lower left are plastic storage folders for other collections, Imaginisce Bubbliscious, Enchanted as well as other company's lines. The lower middle are my cutters, scor-pal, different craft mats and a wooden cutting board. This comes in handy when using my craft knife for cutting or trimming. No damage to my craft mats and no pitting on the blade.
  
Here you can see the repurposed computer desk. On the top shelf  in the 3 containers are Spellbinders dies, Cuttlebug dies, Sizzix dies. The keyboard shelf holds my cutting plates for the Grand Calibur. On the bottom are more embellishments separated in to some colours, Princess, Disney, Boy and Girl.
 On top of the shelving unit are my embellishments sorted by season and Holiday. 3 containers are ribbon, my ATCs, Cards, Bling and Journal cards. Been working on using my stash but need to use it faster or I will not have more room for more items in those containers.
 Here is a picture of my desk from the door to my son's room. Not too clean as I am working on different projects, mostly cards right now. And of course my Favourite tool Spellbinders Grand Calibur.
 Above my desk and the storage unit is my display wall. Here you can see a banner with my Screen name "Drayia" on it, this was made for me. On the right hand side of the picture is a purple butterfly that my DH purchased for me our first Christmas together. On the left hand side is a purple S for my real name "Shana", again this is something made for me, on it reads "home, joy, I love my family". Top of the unit are some jars with more ribbon, my altered tin for lace, which I need to buy more of, a made from scratch index card box that I keep addresses in for my scrappy pals that I send cards too.

Starting from the top left, Martha Stewart punches, corner, boarder, and doubled sided. Next is paints, Mod Pod and a wooden tray that I altered with special beads, paperclips, and pencil leads. After that comes my containers of brads, eyelets and asst. charms separated by colour, Finally in the 2 containers are my i-Top accessories, and my SewEasy with different heads, flosses and twine. Also here is my baby wipes that I use to clean my clear acrylic stamps with and all the glitter I get on my desk LOL.

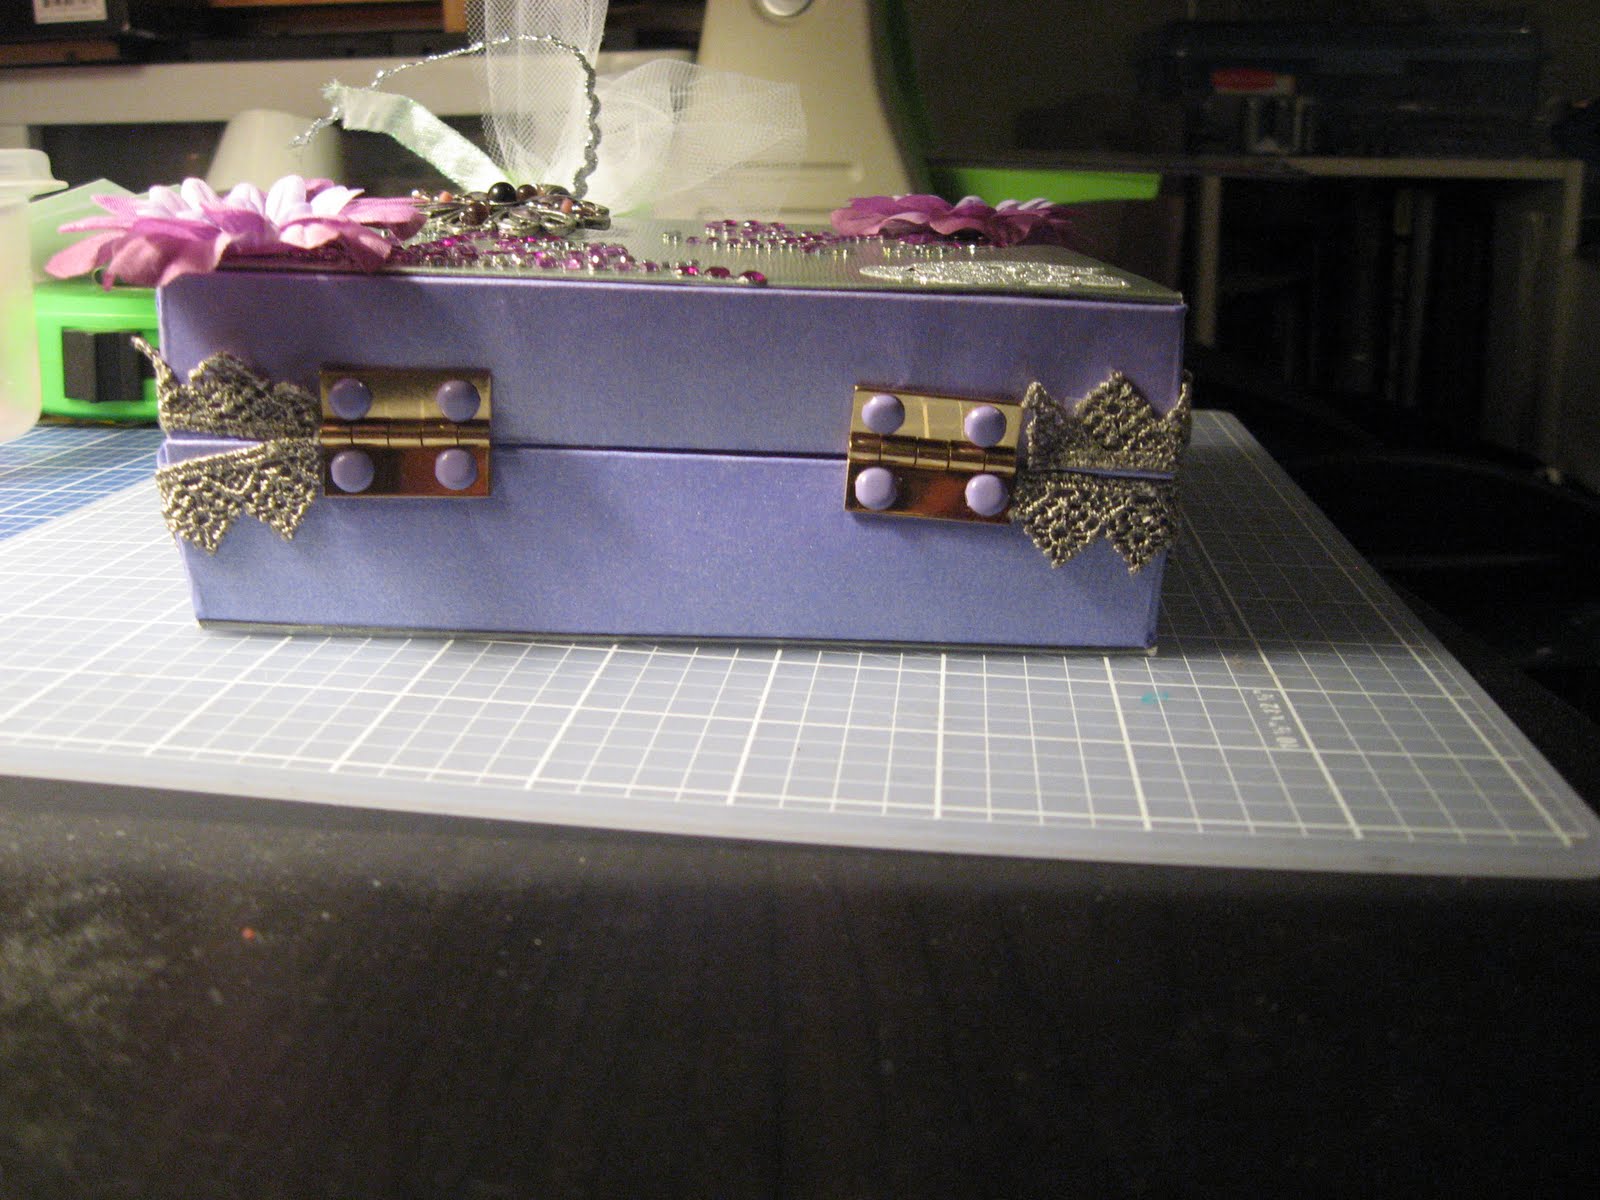
 This shelving unit is on the wall between my desk and my large paper storage unit. The Clock on the wall is waiting for me to print some pictures of my beautiful kids to put into. Displayed here are several things that have been made for me.Top shelf holds a paint can, 2 tags and a purple box that were made or altered for me by several different people. I wish I could remember who but I have been collecting them for that past 4 years and don't recall all their screen names. On the second shelf is my iHome that my wonderful DH bought me this year for Christmas so that I might listen to my favourite music or Pod casts in my scrappy area. You can also see another S that was altered for me that I hang my Glue Arts Pro Glide from. As well is my hanging ornament I made for Spellbinders DT call. The 2 pockets are altered by friends, they started with a jean pocket and then went from there. Also is a beautiful picture of the Washington DC Latter-day Saint Temple.


Coming into the space is a pony wall that I have placed a lot of different small storage shelves on. These hold various items, coloured staples, mini stapler, etc. You can also see my mini Cropping Cutie, my altered recycling pail and my sewing machine that does not work right now. I installed the wooden shelf from Ikea to hold my Cricut Cartages, miscellaneous craft projects and on the end an altered book box to hold all my Cuttlebug embossing folders. It is full so I need to purchase a new one to alter and start filling to LOL. On top of the shelf are more projects that were made for me. On either end are suit cases, the one on the left also contains a mini album. There is also 2 other mini albums there as well, one made with tags the other one with toilet paper rolls. The album in the middle is my first paper bag album that I won from http://marticadesigns.blogspot.com/ It was a great learning experience.

Tuesday, December 27, 2011

2012 Wishlist and comments about 2011's list.

It is that time of year again. How many of you kept your New Years Revolutions? Well I can say that I tried LOL. 2011 saw a lot of changes for me and my family. The biggest one is a move. We moved into a larger place but I lost my craft room, now I have a nook for crafting in. The light sucks so working on lighting in there and its a third of the size of my old room. Now the move was for several reasons, we needed more room, we might be fostering my sisters 2 boys and our landlord was raising the rent but not making the repairs need to the place. My oldest applied to University and got excepted to start in the fall of 2012. She plans on living at home while attending which should save her some money and cut down on the need to have a full time job too. I now have a full day home so the extra room helps, larger back yard and hopefully by this spring the use of the garage.

Now on to my wish list from last year.....
Listed first was the i-Top by Imaginisce, have it love it and have several other new tools from Imaginisce as well. You can check out my archives to see my reviews of the different tools I purchased in 2011.
Second is the Crop-a-dile, it is on its way from http://www.ohmycrafts.com/ , had a gift card from there so used it to purchase the Crop-a-dile and a piercing mat for SewEasy piercing tool.
Third was more punches from Martha Stewart, picked up 2 new ones but would like more, I used my scrap money on other tools.
Fourth was the Cricut Expressions 2, I have chosen not to purchase this tool. I hardly use my Cricut cutter as it is so why spend the extra money on one that would just gather more dust?
Fifth digital camera, that is still un-bought at this time. I have looked at several but not sure what I want.
Last a computer, still don't have one but now I know what I want just need to save to purchase.
I did pretty good with my wish list of 2011 but it is time to make a new one for 2012.

1. Raspberry plate for my Grand Calibur, this is so I can use all my cuttlebug embossing folders.
2. More Spellbinder dies, love their dies, very detailed and make lovely cuts.
3. Martha Stewart punches
4. Digital Camera
5. New computer

Now there are several other little things that I want but not going to list them here. This is my wish list for the truly prized things I want this year. One other thing that is not listed would be to belong to a Design Team. I entered 2 different calls for 2012 but did not get selected. It is time to up my craftiness and be more creative. I have some great tools for me to use to make some incredible projects. Time to make/create something new every day.

Here are my other goals for 2012, Create something new ever week, blog every other day, include more pictures in my blog posts, apply for more Design Team calls for the 2013 year, organize my scrappy space so that all my new and must have tools are within hands reach. Plus increase my followers, not sure how to do this, will most likely talk to a couple of fellow bloggers to get ideas on it.

Lets see how well I do in this coming New Year.
Wish you all the best and a wonderful and Happy New Year!! :D

Thursday, December 15, 2011

Design Team submissions

Well now that I know I have not been selected for Spellbinders or Imaginisce Design Teams 2012 I can show you my projects that I created for them.

This hanging pendant/ornament is open at the top so you can put a little gift or treat into and hang on the tree. I made this with Cor'dinations CS and Spellbinders Nested Pendants. This was my submission for Spellbinders. I used my d-stress tool to the lacy edges to take the colour off so the white core could show through. I applied the clear crystals with the i-Rock. I scored the edges with my Scor-pal and used Glue Arts pro glide to attach all 3 sides together. The snowflake is an acrylic snowflake that I added Icicle stickles to to add more sparkle. The silver glitter brad and snowflake ribbon were miscellaneous pieces from my stash.
 The next projects were 2 of my submissions for Imaginisce Design Team 2011. The card is made using their Christmas Cottage collection from 2010. The silver studs were applied with the i-Rock tool and I used one of their stencils to get the swirls just right. There is like 4 different layers on this card and really enjoyed making one like this. I love the fact that with any of Imaginisce's collections you can get stamps, ribbon, die cuts and stickers to match.
Here is the first page of a 2 page LO I also made. Using pictures of my little Cara who is now almost 2, I matted them and then made my own brads using the i-Top tool and fabric. Then using different fabric flowers I placed them on the page. On her head is a jeweled crown sticker, I thought it was the perfect touch for that picture. I love her little bum in the picture with the wings she was such a tiny thing at first.
 Here are a couple of other pics from the same photo shoot. Again 3 fabric flowers with my own brads, also a tag I made that says "my princess". Again matted the photos to help them stick out more. I also used some mesh and a paper boarder.
Here are the two pages side by side. It is hard to see in the pictures but I used several elements on each page to marry them together. There is the paper boarder strip and the pink iridescent mesh on both pages as well as the mats on one page match the paper used on the other one. Looking at these makes me realize I need to either get a better camera or learn to take better pictures because some of the detail is missed and that would impact the judges decision for the DT call. Well I know what I want for my birthday in May. A new, better camera!


I have already started to think about and plan what I want to do for next years design call. Imaginisce has a really cute Spring/Easter collection coming out that I will have to go get. I know just what I want to make with it, and then I have to put it aside some were and not post any pics about it so I can use it for next years DT call. Spellbinders will be a little bit harder, but I hope to buy more of their dies so that I can come up with something incredible. I am thinking of a LO for them instead of mixed media but we shall see. I have a large project sitting in my craft room that I cant think of what to do with it right now. I have a whole year to plan so might be able to come up with something for it LOL. Thanks for all the well wishes as I tried my hand for the first time at a couple of DTs. It means a ton to me, and I am grateful you all wish to continue on this journey of crafting discovery with me.

Friday, December 9, 2011

One more week

All I have to do is wait one more week! Next Wednesday I should hear from Spellbinders and about the same time from Imaginisce. I am more excited for next week then I am about Christmas right now. These are 2 amazing companies that make great products and I got pass my self doubt to apply to them. Crazy I know, but so exciting. OK really its just the first part of Spellbinders DT call but still I am a little giddy about it.

In the mean time I am collecting so supplies to show you a new technique I learned and believe me you will LOVE it as much as I do. I plan on using it on the next submission to Spellbinders if I make it that far. I also plan to do a different project for you so you can see it. I am planning on making a LO for Spellbinders and a Card for you.

I am also reading up on how to tweak my blog to make it more personal and (if I can) sparkly like me LOL. My blog right now is pretty run of the mill just like everyone else's so my goal over the holidays is to learn and play with the design. I also have a friend who, hopefully, will help me and give me some pointers on how to take nice pics of my work. I figure if I am going to start pursuing positions as a designer for companies I need to look more professional. I can dress the part in person but now I need to add that professionalism to my blog and photos. I guess that means cleaning up my craft space, adding more light and taking some pictures so you can see the new area I have. Also need to learn how to take nice videos and post them here and YouTube. I have my work cut out for me but I have a easy week between Christmas and New Years with only one child other then my own to watch in my day home. That will be my main play week, in the mean time I will be reading and taking notes, creating and relaxing before the New Year starts and I start on my new schedule.

Happy Holidays everyone and I will be doing a give away January 1st for my loyal readers and followers. Now to figure out how to use random.org LOL.

Tuesday, November 29, 2011

Waiting

Now the waiting begins. Wish I had more to report but I don't. I received a thank you from Imaginisce for submitting my application for the Design Team and told that the team will be contacted by email. Once they are contacted it would be announced on their Blog by the middle of December. In the mean time I need to finish up my entry to Spellbinders Design Team call and then find something to distract me from it all LOL.

I love both company's and plan to update my top 5 favourite companies in January along with my wish list, man has that change ALOT this year. I will also explain why it has changed and how it will effect my crafting. Plus I will go over my goals for the new year. I have already started writing that post as it will be a long one but hope to include pictures and links.

Thank you to my followers for sticking by me this year as I learn more about paper crafting, I hope some of the info I shared was new and helpful. I look forward past this crazy month of December that is coming upon us so quickly and see many great things. I plan on sitting down with a friend, I hope, to help me tweak my blog to make it more personal and interesting. Learning new techniques, which I do have a new one to show you. Figuring out how to use my video camera to record new techniques so I can show you how to do them, and increasing my readership. Thank you for coming on this journey with me and I look forward to it continuing.

Friday, November 25, 2011

Submitted my first DT call.

Well I did it. I finished up several projects that I needed for the 2012 Design Team call for Imaginisce. Did my little paragraph about me and attached the pictures then pressed send in my email client. After I did that I said out loud "I am NUTS." LOL. I know there are people out there that do beautiful, elaborate work and that besides them I am a very simple crafter. For other people I make elaborate projects but when I am doing LOs for my family I tend to do more simple ones. I like to have the pictures be the focal point of the page. The idea for me to apply to Imaginisce isn't just about show casing my work but to try something new. I know if given the chance I can be very creative and I love working with their products. I love deadlines and thrive on that sort of "stress". Plus it would be a whole new learning experience for me. I want the chance to be criticised and to work with a team of people who enjoy the same things I do. I am so glad I have the full support of my husband as I try something new for me.
On another note I hope all my American friends had a wonderful Thanksgiving and are getting some incredible deals on this Black Friday!

Sunday, November 20, 2011

I finished my first project to submit to Spellbinders DT call. Took a picture and had some one take a look at it. Now I need to find a better place to hang it and retake the picture. The lighting was not the best so the project did not show up great. Once it is submitted and the deadline is past I will post it here for you all to have a look. I am really happy with how it turned out just not sure if it is what they are looking for but then again who ever is LOL. The next step for me is to take pictures of the other projects I have completed for Imaginisce DT call, I have to finish that all up today, do a write up and off it goes. Again once the deadline is pass and the review is done I will share pictures of my work. I love both companies and it would be amazing to work for one. Crossing my fingers that at least one company will like my work.

I also have another Tool Review for you... it is Imaginisce i-Top 2.0.

Imaginisce says it is a lighter tool to work with, easier to grip handles, improved brad making ability and a new size head to interchange 34mm, Wider opening to place fabric, paper and the brad so it doesn't fall off, and better grips for the brads to hold them in place.
I have small hands and find it just a little wide but not uncomfortable to hold. It is also very light as they claim. I do not have the large 28mm head or the 34mm head to make the large and extra large brads with but plan on ordering them in. I used light weight paper for my first brad and in under a minute had a custom brad made and ready to use. Easy to read and understand instructions come with the tool and I can't wait to start using it on cards and LOs. Of course cards have become my passion because they are quick to make and you see results with them right away. LOs take more planning and work LOL. If you like brads or making custom pieces for your cards and LOs this is a tool for you. It works with both paper and fabric so again a great way to add some dimension or interesting elements to your work.  I look forward to hopefully posting some pictures of my work here soon. In the mean time here is a link to my online gallery at sb.com http://www.scrapbook.com/myplace/index.php?mod=galleries&u=237313 Have a wonderful day everyone and be creative!

Friday, November 18, 2011

Tool Reveiw d-stress

Hi my friends, I am back with another tool review plus will include a link to my pal Pinky's video on how to use this great tool.

I am getting some great deals on http://www.scrapbooksteals.com/ so again I purchased from them a d-stress tool by imaginisce. It came with everything you see here and 3 extra sanding bits. Like all the current tools from imaginisce this is cordless and requires 2 AA batteries. It is light weight and fits nicely in the palm of your hand. I am currently experiencing technical difficulties with my camera so was unable to upload a picture of the different projects I have use this on. So far I have used all the tips except the embossing tip, I want to get some glass to try that one on. I never really did alot of distressing or sanding on my cards or LOs because it seem to take forever and you did not always get the look you are after. Now that I have this handy little tool it is so much easier and you can be very precise where you use it. Works the best on heavy card stock and loved using it with Core'dinations card stock. Also found it very useful when doing altered products and needed to remove access paper from the edges of what I covered. This would make the perfect gift for you or someone on your list that loves to do shabby chic or vintage style paper crafting. Also is a wonderful addition to your tool assortment to start adding some different elements or trying new styles. So simple to use that it is a perfect tool for new paper crafters!

Here is Pinky's video, please check it out!
http://www.youtube.com/watch?v=qvvGME4OcH0

Saturday, October 22, 2011

OMGosh What I am thinking!?!?

Right so its that time of year again, you know when all the scrapbooking companies put out their Design Team calls for the coming year. Last year time ran out for me to try and summit something so this year I have already started. I am going to enter to and see what happens, in reality I only want to be on one DT but the likely hood of getting selected is low. I still see myself as a beginner, learner and I question myself all the time. Sometimes it can take days to come up with an idea or put together some paper for a item in a swap like a tag. Other times like this evening an idea comes to mind completely done and I just have to figure out how to make it look like the image in my mind. Well I almost have my first attempt at a somewhat original project done. Once it is completed I will take some pictures(sorry cant share it here yet) and send it to a friend who is on a couple of DTs to critic it for me. Then back to the drawing board if necessary or just tweak it a little. Then I need to sit down and fill out an online application and send it in with the pics of my project and cross my fingers LOL. Once that is done I will take a little breather and start on a second project for the next part of the competition just in case I make it past the first round picks. Now that is for one of the DT jobs I would like, after that I need to get out all my Imaginisce products and design something for them and submit it. That one seems to be less stressful to do but both will be stressful wondering if I am good enough. Once the projects get pass the selection process and I am given permission I will post pics and tell you how to make the projects.
Good luck to all those that are trying out and I know that in the end it will be a plus either way because in the end it will be a great learning experience.

Friday, October 21, 2011

Spellbinders

Looking back at my blog tonight I noticed that I had not talked about my new favourite toy, I mean tool. For the first half of this year I started to purchase Spellbinders dies, Nestiblities, and other such products, with the intention of buying a Grand Calibur to replace my Cuttlebug. Of course my favourite place to buy Spellbinder products is at http://www.ohmycrafts.com/ , they have excellent prices and the shipping into Canada is very reasonable. Well as I purchased their dies I kept putting off the BIG purchase of the Calibur. I belong to http://www.scrapbook.com/ and belong to a Queen of the Month swap, one month the Queen picked wanted a Cuttlebug so I packaged mine up and sent it to her, one of the other ladies in the swap purchased new plates for her and then we, as a group, got her several embossing folders and dies for it. Now I was without a diecut machine, that is other then my Cricut, which hardly gets used. I did this to force myself to purchase the Grand Calibur, which I did 2 months later! I LOVE it.

The cuts are much crisper, details more intricate and I can cut a bunch of things at a time. It is very sturdy and I love the colour. Now all I have to purchase other then more dies is a Raspberry plate, which is an adaptor plate for my Cuttlebug embossing folders. This is one tool I will recommend to my scrapbook and paper crafting friends to purchase. It is completely worth the price and will be in my travel bag for crops that I will be attending. Also within the first month I had a little issue with it and contacted Spellbinders about it. They contacted UPS to come and pick it up, fixed it and sent it back at no charge to me. They were wonderful about making sure that as a customer I was satisfied with their product and provide some of the best customer service I have ever had with a defective product. I can honestly say that about them as I work in a customer service related job and deal with product return and dissatisfied customers for one reason or another. It tends to be my job to find a way to make them happy and address their concerns. So again I will say this, Spellbinders is one incredible company in both their product and in their customer service! The Grand Calibur is a must buy ladies, you will not be disappointed. I give it a 10/10!


Friday, September 30, 2011

New Tool

As a crafter I am always in search of new tools or products that can make my life easier, I have several tools that I love and use all the time. I also belong to several sites that offer some great deals, one of these sites is http://scrapbooksteals.stealnetwork.com/ . A couple of weeks ago they offered the Imaginisce i-Bond with all the glue sticks for $12USD, well with shipping and conversion it still only cost me about $18 which for Canada is a true steal. I was looking forward to this as I love using my normal glue guns but always looking for less cords because in my new space I am limited on plug ins and space. This tool takes 4 AA batteries, has a light on the front, comfort grip but is a little heavy due to the batteries. The first time I used it was to make a couple of wreaths for my outside door. I tried to upload pictures to show you but the camera that I took them on is experiencing errors when connected to the computer. The first wreath was from an idea I saw on http://www.youtube.com/watch?v=_B5bEfRAVSs , very cute but it doesn't hang well on my door and the crayons would endup getting knocked off. The second one is a Halloween wreath which I will take another picture of with a different camera and upload it. I really like my Halloween wreath. The nice thing is neither one cost much as I got all the supplies at the Dollar Gaint. I made both wreaths one after the other, testing the limits of the i-Bond. Here is what I found. The glue came out nice and steady, it was great having a light, over heated and shut off but I am guessing that if I had not made one wreath after another it would of been fine. Did not burn my self like I am prone to do using my other low temp glue gun. The handle were the batteries are got very hot again before it shut down. I would not recommend this glue gun for large projects but for cards, LOs and other small projects works perfectly. I would buy this again even knowing that it is not good for large projects. I don't do very many large projects and this was just a way to test its limits. Love the coloured and glitter glue sticks. Over all I would give it a 7 out of 10.

Now I just ordered yesterday from ScrapbookSteals an Imaginisce d-Stressing tool with 3 tips. Once that arrives I will play with it and let you all know what I think of it. Hopeing to be able to grab and i-Top and the new Imaginisce hand iron for there soon to. Have a great day all and enjoy your crafting time this week end.

Tuesday, September 20, 2011

Stamping

So I have really gotten into the whole stamping thing. I love making cards, just need more time in my scrap space, but found they were lacking a little something. I had quite a few wooden mounted stamps but never really liked using them as I found it difficult to line them up just right. Then I discovered CTMH acrylic stamps which are clear and you mount them on a clear block. Much easier to use and clean, just need to figure out a way to store them all so I know what I have, LOL. One of the Blogs I follow is Pink By Design, she makes her own stamps and sells them. Some of them are designed to go with Cricut Cartridges and some are work great with Spellbinder Dies. She has a Stamp of The Month club that I was dieing to join, which I finally did last month. The stamps for this month are Halloween themed and are the cutest things ever. It has several children in costume and several different spooktacular sayings. I can't wait to go and craft some cards today. My oldest daughter loves the Canadian set I ordered from her, hockey and maple leafs plus some adorable sayings. Needless to say the one "Handmade in" then a picture of a maple leaf is both of our favourites and will be going on the back of our cards. I think Pink By Design has replaced CTMH as my favourite place to get my stamps from. Their prices including shipping are cheaper then CTMH which is a plus to me.
So speaking of CTMH, I was able to pick up 17 different sets of stamps for under $140, these set normally cost between $25-$35 each so quite the steal there. I do believe it is now time to start looking at Copics and try them out to see if I like them. Plus there are other ways to add glitter to the images other then stamp ink. I plan on learning some new techniques this fall when it comes to stamping and embellishing the stamped images. Time to check out my LSS to see what classes are offered.
On another note, hope to have pics next time of my new scrappy space, I just need to clean it and take the pictures LOL. Have a wonderful day, and be creative!

Monday, September 5, 2011

Teaching?? Maybe.

Well out and about today picking up craft supplies I went into Michael's to find out about teaching/taking classes. Talked to a great Associate there that provided me with some great info. First they have no teachers for Card making or Scrapbooking at my location, Second they are hiring instructors but right now for cake decoration, I am self taught LOL. And Third they/management wont even talk to me until I apply online. Alright, so I come home and load up their application and it is an hour long with the first part timed. Need to answer x number of questions in a set amount of time then on to 12 pages of questions that are repeated or worded differently each time you see them. OK so that is done now to wait a few weeks for them to get my application then to go in to the store and talk to the lady that is in charge of hiring instructors. Maybe I might make some money to support my habit LOL.

If this doesn't work out maybe I will try my LSS next. I know I can do this just need to be more confident in the work I do.

Friday, September 2, 2011

Card making day

Hello all...Last week my oldest daughter and I got out my supplies and took over the kitchen to make cards. I belong to several cards swaps and she belongs to one. We are behind in our card making and sending so here are pictures of what my kitchen counter and table looked like for most of the day.
 That is my new Grand Calibur and this was the first day to play with it. It works wonderfully and the cuts with their dies are so detailed. We really enjoyed cutting and embossing different labels and things for the cards. It did make a loud popping noise when putting the pendant die into the machine so Spellbinders willing took it back to fix it and I am currently waiting for it to be returned. In the mean time I have received about 6 more sets of their dies that I ordered from ohmycrafts.com. Excellent site to order from and the shipping is very reasonable. They are my go to site for anything Spellbinders LOL.
 You can see my daughter Michaela in the above picture, she was really enjoying embossing then adding glitter and heating it. She has now requested more embossing powders so she can do more with the embossing gun. I think we will do this once a month on PD days. It was such an enjoyable and bonding experience.
 Following is a couple of the cards I made. This one is very simple and I used different rub-ons for it. Not to fond of rub-ons they do not always come out looking nice.
 I corner punched the patterned paper and then the green cs is cut using the larges die for Labels Five (SB). Then using a stencil from Imaginsce I put on dots with stickles.
 Corner punched and boarder punch then added orange glitter. Used the middle size Die from Nested Lacey Pennants (SB) with a thicker circle saying Thanks.
 Again with the corner punch then using pop dots attached a die cut large Blossom Four (SB) Added fabric flowers that have stickles highlighting the petals and a rhinestone center. Made a fabric bow.
 Basic Birthday card
 Foam stickers, 3D stickers and flip flop buttons.
 Used the Tulips Shapeabilities Pendants for the center piece pop dot it on to some green ribbon and added silver studs from Imaginisce.

Tuesday, August 30, 2011

Frustration with a Capitol F

Hello my crafty friends, most who I know from sb.com. This last little while has been very busy and I am looking forward to school beginning tomorrow so my days can get back to normal. I plan on being up every morning by 5:30am to make a hot breakfast for my teenagers and hopefully to get in more blog/computer time before my day starts at 7:00am with the kids I babysit. I am hopeful that means more post on my family blog and this one. Sorry this post is not about crafty but about how to maybe fix that nasty issue of trying to post to 3rd party blogs and receiving an error.

Now on to my FRUSTRATION!  I love to read crafty blogs and I follow a good 3 dozen of them, which lately I have not had time to even read. I have about 3-5 that I read everyday not matter what and I love to leave comments. Plus several of my fav ones are companies who routinely have give-aways. While ago there was a update done on my computer and to several different programs. While this caused me some grief as I was unable to post anything, I kept getting an error message stating I did not have permission to view this blog, after I just read it, and to log off then back in. Now following the instructions I was very hopeful but it did not work. After going thorough this for several days I contacted the blogs and inquired about a fix and why I was not allowed to post anymore. It got so bad that I contemplated cancelling my blog acct. and following no one. Once I calmed down and had a few days to wait for a reply I did some more research and found I was not the only one having these issues so I try the solutions that were listed and still no go. Then I stopped to think, I have not been a computer tech in sometime so I don't always think like one anymore. I started to think about the updates and any programs I might of add that could be cause this problem. It had to be something I had done to my computer in the last 3 months. The first place I look and played with was my Virus scanner, they are notorious for being most peoples problems with computer either due to conflicts with other programs or blocking legit programs. Well I use AVG free 2011, great product was one we almost always recommended because it is easy to use and well there is a very good free version. Plus it doesn't use up alot of system resources like some others do. There is an option to temporally turn it off which I did and low and behold I could again post to 3rd party blogs! Now to figure out which part of AVG was the issue and see if I could permenitly turning it off with out putting my computer at risk for Virus and such. Went to their help section and was issued a pin and asked to call, so that is what I did. Once I got onto the phone it was a matter of 15 minutes later and all was fixed. AVG has a component called LinkScanner which deals with 3rd party blogs and websites that you would link with when posting. All I needed to do was to disable LinkScanner and I was again posting on my fav blogs!!  I also posted this "help" I received to the blogger help section since it was a wonderful help for me and it might help someone else as there seems to be quite a few of us with this issue. I hope this might help some of you and I promise tomorrow I will load up some pics of cards I have been working on and hopefully pics of my new scrappy space. It is half the size of my last room....I am now in a nook :(

Sunday, July 3, 2011

4th of July giveaway!!

I know I have not blog in awhile and will up date everything soon, pics of new scrap area in the new house, and a bunch of crafts that I have finished or been made for me. But while we wait for that I just had to share an amazing giveaway but my FAVORITE blogger Pinky. Please check it out and when you chose to follow can you please mention I sent you. Thanks all :)

http://blueyecicle.blogspot.com/2011/07/10000-cricut-cartridgeclear-scraps.html

Wednesday, June 1, 2011

Moving

So sorry my friends been very busy with family matters and having to move. We just might have 2 little boys being added to our family so needed to find a larger place that included room for me to create :) . Well we were very lucky to find a house just around the corner and a block away. We will be just across the street from an elementary school which is perfect as one of the boys starts grade 1 in the fall. We take possession of the house on the 15 of June with an official move in date of the 25th. Needless to say I am busy packing and the first place to pack up is my scrap room. I plan on moving that over first and starting to set it up so that I will be able to get a little creative work done on cards as I cant take time off from 2 swaps I am in that require cards to be made and sent out :) . Hopefully everyone I need to send to will be understanding. I most likely will use up the ones I have been making and sending to family because that way I don't need to worry so much about what everyone else needs. It sucks that this is happening right now because several of my favourite blogs are having DT calls right now, oh well there is always next time LOL. I finally feel confident enough to submit my work to be judged and to try out for a DT and I cant do it. That just means for me that I will have that much more time to better myself, increase my tools and be more creative. I cant wait! Once we have moved and I have set up my new scrappy space I will take some pics and post them for you all. Have a great couple of weeks and I hope to have some incredible things to post in July.

Monday, May 2, 2011

First Suit Case

Last year I stumbled across this blog and project. At the time Leslie was having a challenge but I had way to much things on my plate at the time to play along. I got in contact with her this year and asked if I could use her idea for a swap on scrapbook.com and she said yes. Here is the link to her tutorial and be sure to check out her store too as you can get some neat stuff there.
http://leslieguerrero.blogspot.com/2010/09/paris-here-we-come-tutorial.html

 I made the sides 1" smaller then Leslies and it worked out just as well. I used silver cs by DCWV. It is nice and heavy for this kind of work. There is 3 layers to the flowers, the Paper Studio, with rhinestone center brads. Major purple Bling flourishes and a silver sticker one. Attached to the handle is a purple and brushed silver medallion. Simple but with a BIG statement. As you can tell the theme is purple and silver, those are the colours my pal picked and of course they are my favourite colours too so I have TONS of things in these colours.
 Bottom of the suit case. One of the other ladies in the swap was having issues with the hinges, I too was looking for something else to use then what was described, so she went with real hinges. I borrowed that from her. I found these little hinges at The Home Depot and used purple brads to adhere them to the cs.
 For the handle I again use DCWV cs silver glitter, ran silver lace around both edges of each side, added a white tulle bow and some different kinds of ribbon too. The latch you can just see is a box latch again picked up at The Home Depot.
As you can see it stays closed well and sits very prettily. It turned out great and now am off to make a second one, then to package them both up and ship to my American friends!

Monday, April 18, 2011

Spellbinders and GlueArts

Not sure if I have stated before how expensive it can be to buy Scrapbook supplies and tools in Canada but it can be quite crazy. I have started to do a lot of buying and shopping online. A friend on scrapbook.com sent me a link to ohmycrafts.com. Now sb.com has a huge range of products and some OK prices but the shipping into Canada is ridiculous and that is what makes or brakes me ordering from the states. Now ohmycrafts.com shipping rates are very reasonable and every time I order from there I am happy with my choices. My latest purchase was  Glue Arts Pro Glide. It came with 2 additional cartridges for only 24.95 and my first set of Nestiblities by Spellbinders. The Pro Glide was a excellent purchase and works incredible well. I just need to get more cartridges LOL. Spellbinders here in Canada cost $45 and up, the set I purchase cost me $14. Cant wait to purchase more but thinking I am going to check out ebay now and see what else I can get and maybe cheaper. I made a gorgeous card for my grandma that I am so pleased with. I will post it and all my other cards I made for you later. Have a wonderful creative day my friends and enjoy this short week.

Monday, April 11, 2011

Cards

 I belong to several card swaps so I need to make alot of cards. I keep forgetting to take pictures of them before I send them in the mail LOL. Here are 2 Christmas ones I did using the BoBunny Midnight frost collection. I stamped a sediment on the tags added some plastic snowflakes and red bling flourishes. Over all I think they turned out quite nice.

 This is a friendship card not the coffee on the chipboard sticker. I also stamped and embossed a sediment on the chipboard tag.
 A happy Birthday card of course. I cut out around the flowers before layering them on to the pink card stock I think it helps them stand out more.
 During March Imaginisce had a doodle challenge. I made these next two cards early in the month but never got a chance to post them for the challenge. All the paper use is from Imaginisce. For the Christmas one I used Cottage Christmas and added the silver studs using their flourish template and i-Rock of course
For this one I used the Dinoroar collection. I punched out the circles in the coordinating paper and then made a bow in orange to add to the dinosaur 3d sticker. I also added gold studs to the ribbon because even boys need a little bling in their lives LOL.

Imaginisce prize package

So awhile back I won the complete Berrylicious Collection from imaginisce. This is such a fun line and just look at all the goodies they sent to me. The stamps are adorable they all have little faces on them. Fabric, card stock, chipboard all stickers and 1 sheet of each style of paper. Here it sits just waiting for me to create with it. Now that my big mini kit swap is done it is time to get creative. I am just waiting on my Glue Arts Pro Glide which should arrive anytime this week. Not only will I finally have my ATG but my first set of Spellbinders will arrive. I plan on making a lot of cards with this collection and maybe 1 or 2 LOs I can't wait to start. I just need to pick out some solid cs to go with everything do some stamping and colouring with my pencils...thinking I might have to try some copic markers. And then let everything come together. Once I have made some things I will be sure to post them for you all to see.

Mini kit swap

 I love to do swaps. Its a chance for me to make different things and exchange them with others. I just finished a huge swap for mini kits unfortunately I forgot to take pictures of everything I made.

This first picture is of my fall pieces, I needed to do a title and deco squares. All pieces had to match and be embellished at least 3 times. All the cs is DCWV. I cut everything out on my Cricut using Once Upon a Time cart for the title, Doodlecharms for the leaves and squares, and Camping for the tree branches. All the gold studs are from Imaginsce attached with the i-Rock. Brown stickles on the leaves and glitter on the acorns plus ribbon from my stash.
 My next group was Spring. Again all cs is DCWV. I used my MS corner and boarder punch then layered coordinating paper and cut out the word spring. I used a rhinestone and i-Rock to put the dot on the i. Prima flower and a glitter brad for the center. On the file folder I layered the cs on top of white ribbon and then added a Prima flower and rhinestone for the flower center.
 Halloween was easy as I just needed to make a journal spot and 4 pieces of coordinating cs. The journal spot is cut from Cars cart. on the Cricut. Stamped on the journal area, added some ribbon, bling pumpkin and then a chipboard glitter bat. It turned out very cute.
 Summer required a photo mat and deco squares. Again used cs from DCWV. On the mat I used some matching ribbon from my stash as well as a butterfly charm. I then attached a amber rhinestone to the lower right corn and added leaves to it. The deco squares edges are inked, added matching ribbon, flowers with stickles, wooden butterflies and then one with a rhinestone butterfly.
 For Winter I also made photo mats and supplied matching ribbon. I love snowflakes so everything here is or has snowflakes on it LOL. I added studs to the plastic snowflakes to add little more sparkle. I love Bling and tend to find some way to use it on my projects.
For Valentines Day again I made a photo mat and deco squares. I so love my MS corner and boarder punches I really need to get more. I use lots of rhinestones and glitter, some ribbon and lace

Friday, April 1, 2011

Crafting

This month as been awful for crafting. I need to clean my desk and organize because I NEED to create. I was doing so good there and then bam got hit with everyday life. First the youngest ends up in the hospital and then I get a house full of kids to watch. Don't get me wrong that is a good thing since that is my job but it all happened in a matter of two weeks. Plus moved my youngest into her new room with her little sister. April will be just as busy but I must make time for me otherwise I will be come a grumpy beast LOL. So my goal for April is to create something new every week and post it. I am pretty good at keeping my goals so if I can do this then I will be able to keep it up. This weekend is Card making time I am behind and need to make a TON of cards. Need some new stamps for it and will look at Michael's and my LSS to see what they have. Have a wonderful weekend everyone and hopefully the snow that environment Canada is calling for will go away! :)

Friday, March 25, 2011

Adhesive

Alright now I have been trying out different Adhesives to see how well they work and keep my crafts together. I have found that Ad tech glue runner is OK for LOs that are not to heavy. Plus the refills are very cheap and are available at Walmart. Now I like to make boxes and different shaped containers and found that I need a stronger bond the most tape runners will provide. For the last little while I have been using Scor-tape. The smallest size I have found is 1" which is a little large sometimes. But it has an incredible strong bond. I am still looking for something to use on my letters I cut out on my Cricut. I don't like using glue sticks as I get all sticky but don't know what else to use. Any ideas would be welcome. The one product I want to try does not seem to be available in Canada but I finally found a site that offers cheap shipping into Canada. Not only is the shipping cheap they also have what I have been searching for for months. So now I wait for my Glue Arts Pro Glide to arrive! Once it does I will let you all know how well it works. I am very excited because I also ordered my first set of Spellbinders, Nestibles Labels #5 again on this site they are cheap it would cost me 3 times the amount if I were to buy them here. So go check out ohmycrafts.com for great prices and cheap shipping into Canada!

I hope to post some new projects in the next 2 weeks. I have been very busy with a full dayhome so I no longer have time during the day to scrap and my nights are limited as well. Hopefully I can get my kids to cooperate and let me craft on the weekends!

Thursday, March 17, 2011

Luck of the Irish

Imaginisce is having a giveaway today for a new Cricut Cartaridge on their blog. Check out the fun green cards they created for today. http://www.imaginisceblog.com/2011/03/click-it-with-cricut_17.html

So who wants to win a Glue Arts Pro Glider? I know I do. Check out their blog and facebook page to enter. Here is the link for their Blog, http://networkedblogs.com/fwygg. Have a lucky and happy St. Patrick's Day everyone!

Friday, February 25, 2011

Imaginisce and Giveaway

As you know I have a few favorite companies, DCWV, Imaginisce, Provo Craft, Spellbinders and Prima. Well I belong to their blogs and facebook pages because they are always giving away free stuff and who doesn't want to get things for free. So this past week Imaginisce has had a release party for one of their new collections called Berrylicious and I was selected as Day 3 winner!! This is a beautiful fun, and bright line and I can't wait to see it irl! The projects that their DT made was incredible and so inspired, they completely made me want spring NOW! LOL but then again I am sure we are all tired of old man winter and would love to see Green Grass and Brightly coloured flowers.

Ok on to the next topic...My most favourite Blogger is Pinky and I read her blog before anyone else. My day is not complete until I see what she has created to share with the world. She also has some amazing giveaways on her blog, in fact I won one last month, a subscription to Stash to Treasure. It has video tutorials and classes on it. Cost $5/month for the classes which are about 6 classes long. Pinky was hosting the class for February and she did an retro altered clock. You can also buy the kits to follow along with the video classes.
She is again having a giveway and this time it is the new Imaginisce D-stressing tool, which is cordless. So click on the link and check her out.
http://blueyecicle.blogspot.com/2011/02/creatively-scrapping-d-stress-giveaway.html

Tuesday, February 8, 2011

Potty Training Chart

 I have 2 small girls, Veronica is 2 1/2 years old and it is time to get serious about potty training. She has been using the potty for about a year off and on. It is now time to become a big girl. With that in mind I was checking out Imaginisce Challenge for this month. It is based on a photo and colours.
Veronica is all about Princess right now and I thought that a chart that she could put Princess stickers on for everything she went to the potty.
Now onto a description of the project. Using a piece of cardboard 9 1/2" x 8" I layered several pieces of CS by Imaginisce. I used the new Enchanted line and the older Fairest of Them All. I cut a strip of striped cs from Fairest of Them All then used my Martha Stewart boarder punch to punch it out. I cut a 9 1/2 x 3 strip from the Enchanted cs, cut a 3 x 8 strip of matching cs from Fairest of Them all. First I glued down the Enchanted cs, next along the side I adhered the matching cs from Fairest of Them all and then using Scor-tape I put the striped cs along the top.
To cover the remaining adhesive from the Scor-tape I covered it with blue fine glitter as you can see here in the close up. Using a Die Cut from my stash I wrote her name using Waterfall Stickles, put the Crown sticker from Fairest of Them All above her name and used a rhinestone and my i-Rock for the dot above the i. I used some pink lace from my stash to make a boarder around the white grid paper, this is to hid the additional sheets on the chart. Using my i-Rock I added blue studs to the lace.


Here I layered several flowers from Princess Posies which goes with the Fairest of Them All collection and using a star dust brad affixed it to the Chart. And yes I have a lot of this collection left when it comes to embellishments, but very little of the CS. I LOVE Imaginisce little girl lines, they are so princessy and fun.
I am very happy with how this turned out and my DD cant wait to start using it. She has told me its "pretty mommy" and that is all that is important to me! Thanks for looking.

Monday, February 7, 2011

Jean Pockets

 Alright, On scrapbook.com I am in a swap by Martica. She challenged us to alter 2 Jean Pockets for our pals. Now Martica is the one that got me started last year on the whole altering things and I also won a wonderful paper bag album kit from her blog. I had never done a paper bag album until then. Ok back to the pocket. I had just ruined a pair of jeans by splitting the butt LOL so I took my scissors and cut off the two pockets. This on is in all creams and browns as requested by one of my pals. The CS is DCWV At Home Stack, I traced the shape of the pocket onto the CS and then cut, as you can see it looks crooked but is straight. Gathered the ivory lace along the top and added a simple long fringe to the bottom. Used Prima Say it With Pearls and Crystals in brown and clear, a Prima flower and this beautiful Butterfly from my stash that a pal had sent to me. The hanger is made out of floral wire twisted in half and then covered in brown ribbon. With the matching ribbon I then made a bow, which I have not done in years.

 This pocket is for a different pal, she likes turquoise and vintage. Vintage is not my strong suit but gave it my best shot. Again the CS is DCWV The Vintage Stack, traced and cut out the pocket then punched it with a Martha Stewart boarder punch. Added Prima Say it with Pearls and a Prima flower. The K is chipboard by K&Company that I added turquoise rhinestones to using my i-Rock by Imagainisce and of course a soft blue butterfly. Around the edge of the paper I glued turquoise eyelash fringe and using the last remaining brown and turquoise ribbon I hand gathered it at the top. Again the hanger is twisted floral wire covered with ribbon and a hand made matching bow.
I also backed both my pockets with alittle cardboard to add some stability to them. All that is is needed now is to add a little Rak and send them out. Thanks for looking. I do read all your wonderful comments and love all the encouragement you send me. It is much appreciated and helps me continue to try things that normally I would never think twice about.


Valentine's Day Mailbox

 This was made from a template that I bought and downloaded from thedigichicks.com. I love making different containers and saw this and could only think about elementary school and Valentine's Day card exchange. We always made a container to hold all the cards that other students gave us. So of course I had to make it.
I printed off the template on white paper then traced it onto my cs. Used here is double sided cs by K&Company Seasonal stack. On the back is a 3D dragonfly in pastel pinks and purples. The Flag, which moves, is outlined in Cotton Candy Stickles.

Using Scor-tape I adhered the Ivory Lace then added Pink chunky glitter to cover the remaining tape. The fabric flowers, paper flowers and butterfly are glued with Aleene's Tacky glue. Then added some pink rhinestones to the lower flourish and a little pink bow to the front above the pull.

I really enjoyed making this but found it a little fussy putting it together. If you want perfection have fun because no matter how I bended the cs or made sure everything was aligned it still leans a little to the left. Thanks for looking.